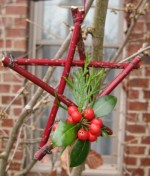
 Outside our kitchen window are several bird feeders that attract a variety of our feathered friends that we enjoy watching as they cavort and eat their favorite seeds and other treats. In addition to several different feeders there, we have a birdbath, small bird garden and a witch hazel tree to provide the birds with food and water as well as cover. In winter the flowers in the bird garden die down and the witch hazel loses its leaves so the setting is just right for a holiday make-over. Rustic stars made out of stems and decorated with greens seem just the thing.
Here are the directions for a very simple, inexpensive star that would make a pretty ornament on any tree, in or out doors.
MATERIALS:
 5 stems about ¼” in diameter and 6” long
 assorted evergreen sprigs such as arborvitae, crytomeria, holly (with berries), and boxwood (otional)
 10” string or ribbon (for hanger)
EQUIPMENT:
 paddle wire (about 2 feet); colored pipe cleaners are good for wiring on ornaments
 wire cutters
 pliers (for twisting wire)
 artificial berries, greens, flowers, ornaments, ribbon (otiional)
PROCEDURE:
Step One:
Collect 5 similar sized, straight stems, the more pliable, the better. I used stems of red twig dogwood because of their red color but any color is suitable. Be sure the stems are alive because dead stems are brittle and may break as you assemble the star. Cut the stems so that they are all the same length.
Step Two:
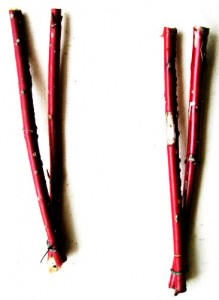
Wire two stems together at the their tops twisting the wire with the pliers to make a very tight joint; repeat with two more stems.
Step Three
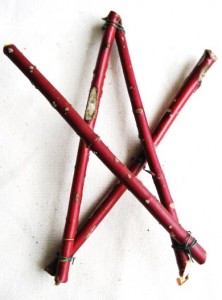
Spread the sticks of each pair slightly and lay one pair over the other so that the free ends meet. Wire the twigs where they meet.
Step Four
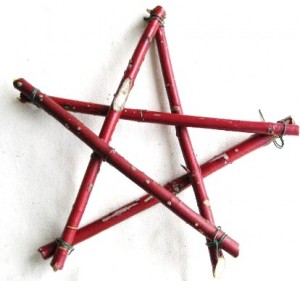
This is the most difficult and crucial step. Take the 5th twig and fit it into the star so that the star will be stiff and rigid. This may mean weaving the stick into place and will depend on the curve of the stems you are using. If the star is not rigid it will collapse or loose its shape so play with sticks until your star is fairly stiff and then wire it into place.
Step Five
Add a string (or wire) for hanging the star.
Step Six (Optional)
Decorate with live greens, berries or artificial ornamanets. If you are using the star inside you might want to cover the wire at the joints with raffia, wool, scraps of cloth or other decorative material. If the star is going to be used outside consider the effects of rain, sleet, snow, and wind and plan accordingly.
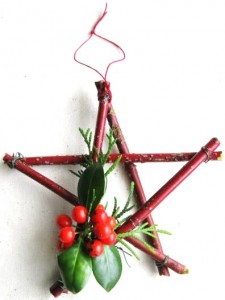
These stars are so quick and easy to make you can create a large number in a small amount of time. The cost is minimal especially since the sticks are free and you can use scraps and leftovers for decorations.
