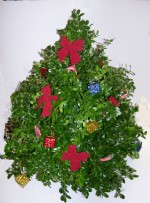
 A small, tabletop tree made of boxwood tips is a beautiful holiday decoration that can easily be made at home. When I worked in a florist we would sell them for $40 each and could not keep up with the demand. English box makes the prettiest trees because they are dense, have a lovely dark green color, and they will last up to a month. I can make one in 1-1 ½ hours depending on how fancy I get with the decorations. These trees make unique gifts too.
The hardest part of making a boxwood tree is finding a supply of boxwood. I used to have large box in my garden but had to find an outside source this year. I did a Google search for boxwood in my area and found a boxwood farm nearby. You may also be able to find box at a local florist or on line but these last two sources will be pricey.
Materials:
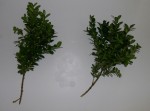
About 40 English boxwood tips as shown. Your boxwood may be branches each with 3-4 tips as those shown.
1 full block of florist foam
1 bowl or other waterproof container that will accommodate a piece of florist foam stood upright on one end.
Florist waterproof tape (about 2 yards)
About 30 6” wooden florist picks (more or less depending on ornaments)
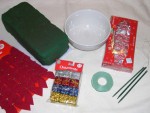
30 small ornaments including miniature candy canes, bulbs, bows, clusters of hemlock cones, etc. Fresh flowers such as mini carnations, baby’s breath, and statice that have a long vase life or dry well. (optional)
Knife (for cutting foam; any kitchen knife will do)
Bucket for soaking boxwood tips
N.B. Craft stores will have foam, tape, and picks; dollar stores have ornaments, and bowls.
Directions:
1. Soak boxwood in a bucket of water for an hour or so. This can be done outdoors as the box is not hurt by cold.
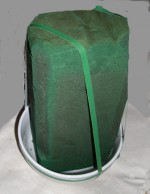
2. Place the foam upright in the bowl, tape it in place being sure that you do not cover the center with tape. I run two pieces diagonally across the corners down to the top of the bowl and then run a third piece around the edge of the bowl covering the ends of the two diagonal pieces. This makes a strong structure to support the water soaked foam, boxwood tips, and ornaments.
3. Shave off the edges to provide a surface for inserting the box tips.
4. Begin inserting box tips about 6-8’ long first in the top and then in the bottom. These will set the dimensions of your tree.
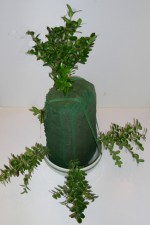
5. Continue to insert tips from the bottom or top as you feel comfortable being sure to make the tips slowly tilt upward to fill in around the tip piece of box.
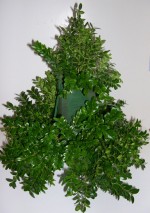
6. Be sure to rotate the bowl as you work so that all the foam is covered and you end up with a cone shaped tree.
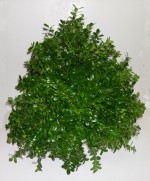
7. Using the wire on the end of each pick, wire an ornament on the end of the picks and insert the pick into the foam among the branches of box. Most ornaments are too heavy to put directly on the ends of the boxwood tips so you will have to wire and pick-in most of your ornaments.
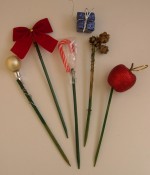
You can add flowers too but realize that most flowers will die in a few days, long before the boxwood will decline, so put the flowers on the day of the event.
8. Add water to the bowl. You will have to add water almost every day as it evaporates quickly. Keep the tree in a draft free place out of direct sunlight for best results. If the foam goes dry the boxwood will slowly dry too and become brittle and loose its shine. It will, however, retain most of its color so will be attractive for weeks.
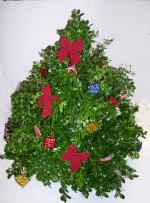
Voila! You have a unique little tree for a special place in your holiday décor. It is attractive on an end table or as a centerpiece; sometimes I make two trees and use them on the dinning room centerboard. However you use them they will give you weeks of beauty.
