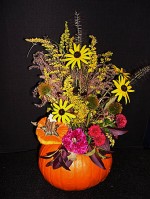
 Halloween means pumpkins and pumpkins suggest a flower arrangement to me. Whether my Halloween pumpkin has been carved, painted, or used unadorned, making an arrangement in the pumpkin is another way to enjoy these wonderful fruits for weeks after Halloween. If you have a pumpkin that is holding up well, you could even use it as the container for your Thanksgiving centerpiece. The arrangement I am showing was made right after Halloween with flowers and other plant material from my garden. In other years I have bought flowers at the grocery store or used dried materials. The possibilities are limitless and that is what makes this an interesting and fun challenge every year.
Materials:
Pumpkin; any size and shape will do but consider the use of the arrangement and the amount of plant material you have/want to use. Very small or very large pumpkins will have unique problems so it is probably best to start with a medium sized one, like 12” across. A blemish free pumpkin is more attractive and last longer.
Marking pen for marking the cutting line on the pumpkin
Sharp knife for cutting pumpkin
Spoon for cleaning
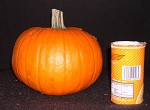 Juice can, vase or other container small enough to fit into the pumpkin and tall enough to extend out of the pumpkin for ½’ or so (this will make stabilizing the vase easier)
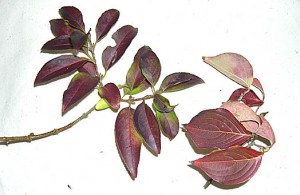
Plant material; flowers, grasses, seed pods, small branches. Be sure that the material is in scale with the pumpkin. For example, I found that sweetgum, and various maple leaves were way to big. Also note the color; most yellow and orange leaves won’t show up well on the orange pumpkin but dark red or purple leaves contrast nicely. The material that I had available were…
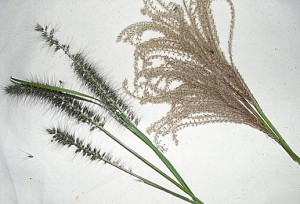
Grasses (Black Fountain grass ‘Moudry and Miscanthus ‘Morning Light’)
Flowers (left to right) mums, celosia, Black eyed Susan
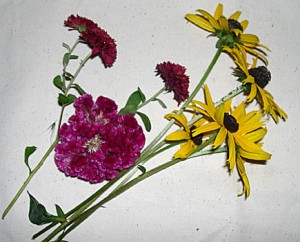
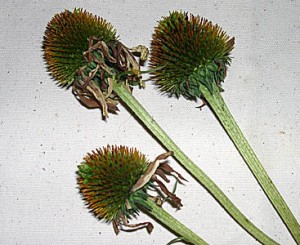
Seedheads (purple conflower with ray flowers removed)
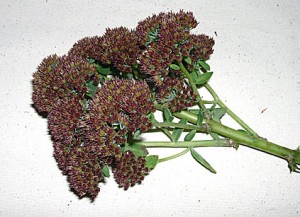
Over the hill sedum ‘Autumn Joy’
Leaves (flowering dogwood, forsythia)
Florist foam (optional)
Florist pick (optional)
Directions:
1. With the marking pen draw a circle on the top of the pumpkin to mark the cutting line. It should be large enough to allow the container to be inserted in the pumpkin when the tip is removed.
2. Carefully cut through the pumpkin skin and rind, remove the top, and clean out the seeds and fibers inside with the spoon.
3. Place the juice can, vase, or container in the pumpkin and fill with water. If necessary, stabilize it with sand, foam peanuts, florist picks or florist tape.
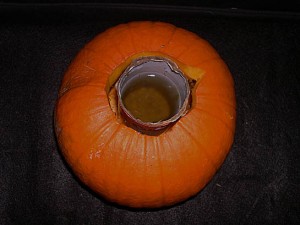
4. Decide on and insert the type of mechanics you want to use; florist foam ( cut it to fit tightly into the can), a plant such as sedum ‘Autumn Joy’ (cut to fit snugly on the top of the container), or crisscross the stems as you insert the plant material into the container. The last alternative takes more practice and I chose the plant option because I had the flower cluster available. If using dried materials you will probably want to use foam for dried and silk flowers or a glue gun.
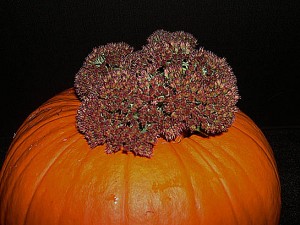
5. Arrange the plant material in the container. Start with the tallest material and fill in with the fluffy material (Miscanthus grass in this arrangement). As you arrange the material make sure that you don’t hide the pumpkin as it adds both color and interest to the overall arrangement. If you like the look of the pumpkin top in the arrangement use a florist pick to secure it into the pumpkin as shown above in the opening picture.
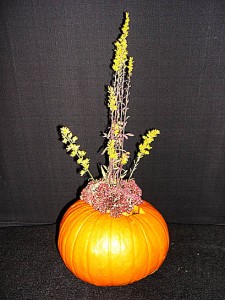
The grasses and leaves give this arrangement a natural, cottage garden look but different plant material and style of arrangement can make it more or less formal, more or less modern or traditional. Changing the colors can completely change the look too so experiment freely and have fun.
