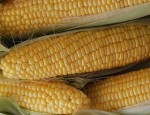
 Sweet corn is a very popular vegetable but not many home gardeners grow it. This is understandable because it takes a considerable amount of room and summer storms have a way of knocking down a whole patch in a few minutes. But corn from the plant to the kitchen can’t be beat for sweetness. As soon as the corn ears are removed from the plant the sugar in the kernels begins to turn to starch and less sweetness is the result. So, treat yourself to some garden fresh corn by growing your own corn at least once. After that, you can decide if it’s worth it.
Here are some guidelines for growing sweet corn.
1. Variety Selection: There are many kinds of corn differing in taste, color, days to maturity, size, yield, size of kernels, tenderness, and disease resistance. In general, hybrids are sweeter, have a higher yield, and are more disease resistance. Click here to read my post on selecting corn varieties.
2. Bed Layout: To facilitate good pollination, plant your corn in a block of at least three short rows rather than one long row.
3. Soil Preparation: Corn is a heavy feeder so get it off to a good start by amending the soil with compost or well rotted manure, and an application of 10-10-10 fertilizer.
4. Planting: Corn is a warm weather crop so plant the seeds once the soil temperature is at least 65o F. In cold wet weather seeds will rot instead of germinate and some seed companies coat the corn seed with a fungicide that can be seen on the seeds as a bright color. Plant seed 2” deep, 4-6” apart, in rows 30-36” apart.
5. Thinning: When seedlings are 6” tall thin the row so plants stand 8-12″ depending on the variety (check the seed packet for specifics).
6. Watering: As soon as the soil around the seedlings is dry to a depth of 2-4” begin a watering regime so that the seedlings don’t wilt. Once out of the seedling stage leaves may wilt during the heat of the day but as long as they recover by the next morning, no harm has been done. A good way to water corn is to dig furrows along the rows as you plant and then fill the furrows with water.
7. Fertilizing: When the corn is about 1’ high apply a complete fertilizer. Repeat when tassels form. Fertilizing can be done in the furrows dug for irrigation an then watered in. If the foliage takes on a yellow color, a lack of nitrogen is probably the cause so apply some high nitrogen fertilizer.
8. Weeding: Most weeds will be shaded out by the corn as it grows but if you need to cultivate around the plants do so carefully and shallowly. Corn has shallow roots that can easily be damaged.
9. Hilling: When the corn is about 8″ tall mound soil around the stalks up to the first leaves. This will help the stalks remain upright during wind and rain storms.
10. Pests: The worst pest is corn earworm. The adult moth lays eggs on the silks, the eggs hatch into worms, and the worm crawl into the ear and eat the kernels. You have probably seen this worms in the grocery store when you strip the husks down an inch to examine the kernels. You can reduce the problem by applying a small amount (1/4 teaspoon) of mineral oil on the tassels. The oil will smother the eggs.
11. Harvest: Watch the silks and when they turn dry and brown, check the contents of the kernels by pulling the husks down a little way and pinch a kernel until the juice comes out. A milky juice indicates that the ears are right for picking; clear juice means they are not ready to harvest (wait a couple of days and try again), and pasty juice tells you that you are too late, the sugar has turned into starch and the corn is best used for creamed corn. If the corn is ready for harvest cook it or chill it immediately. Bigger animals like raccoons and deer like corn too so be on the watch for them. If you have a sure fire way to keep deer away, patent it, and hire someone to grow your corn.
Get the water boiling, melt the butter and enjoy!
